
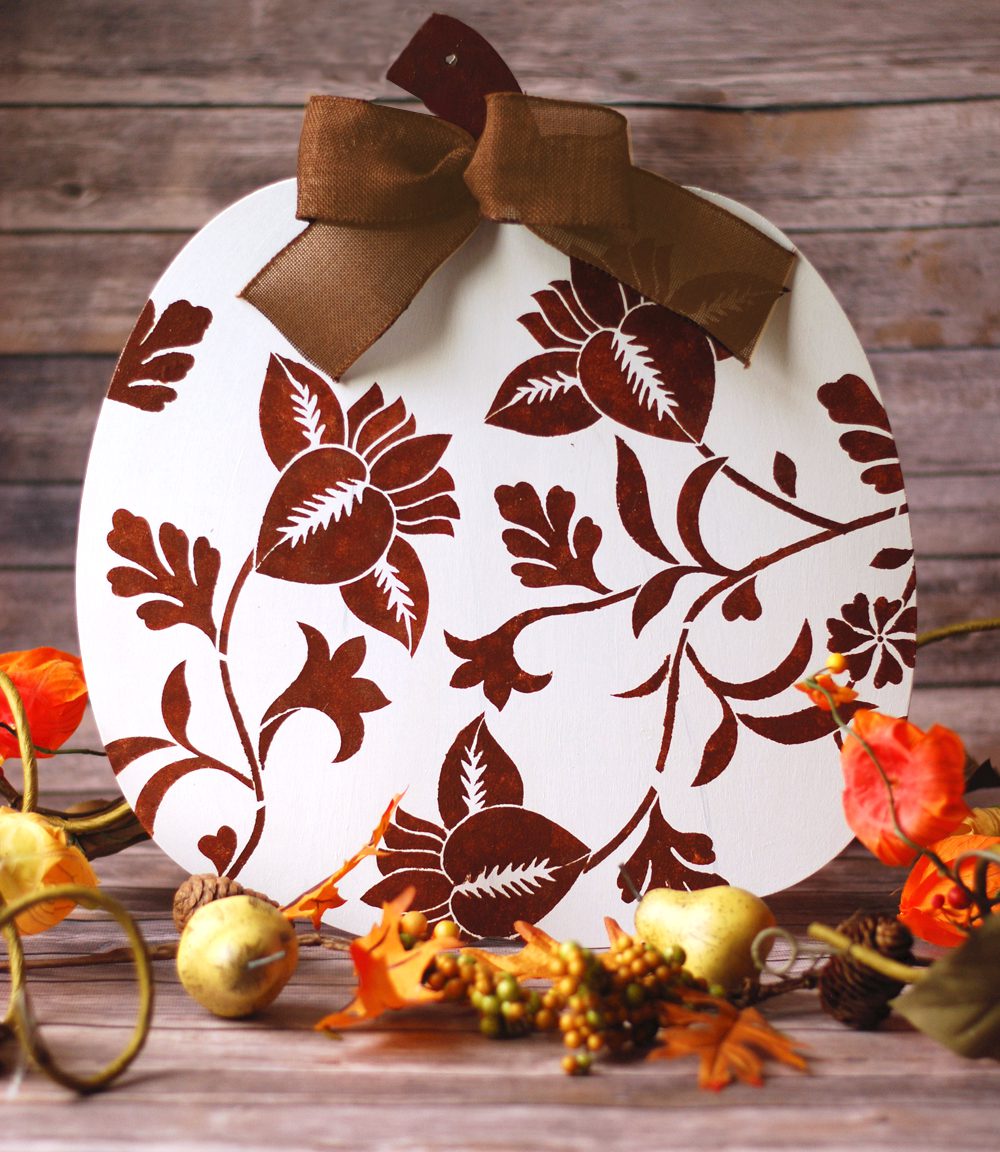
Fall is here, and it is time to decorate our homes with everything pumpkin. Make this beautiful white and brown floral themed painted wooden pumpkin using stencils. This project looks complicated but it really isn’t. Almost anyone with intermediate level crafting skills can make this craft with good results. Some of you may feel artistically challenged, but I promise you, you will be able to produce stunning floral designs with the help of a stencil. A word of warning this project uses the packaged stencils a bit differently from the package directions. Just follow the pictures below along with the instructions and you too will have a beautiful floral painted wooden pumpkin wall piece to hang on your wall or front door.
Supplies Needed:
- Plaid Folkart Stencil 32781
- 16 x 17-inch wood pumpkin wall plaque
- Stencil Brush
- Stencil Creme
- White acrylic paint
- Paintbrush
- Painters tape
- Brown Burlap Ribbon

Painted Wood Pumpkin Instructions:
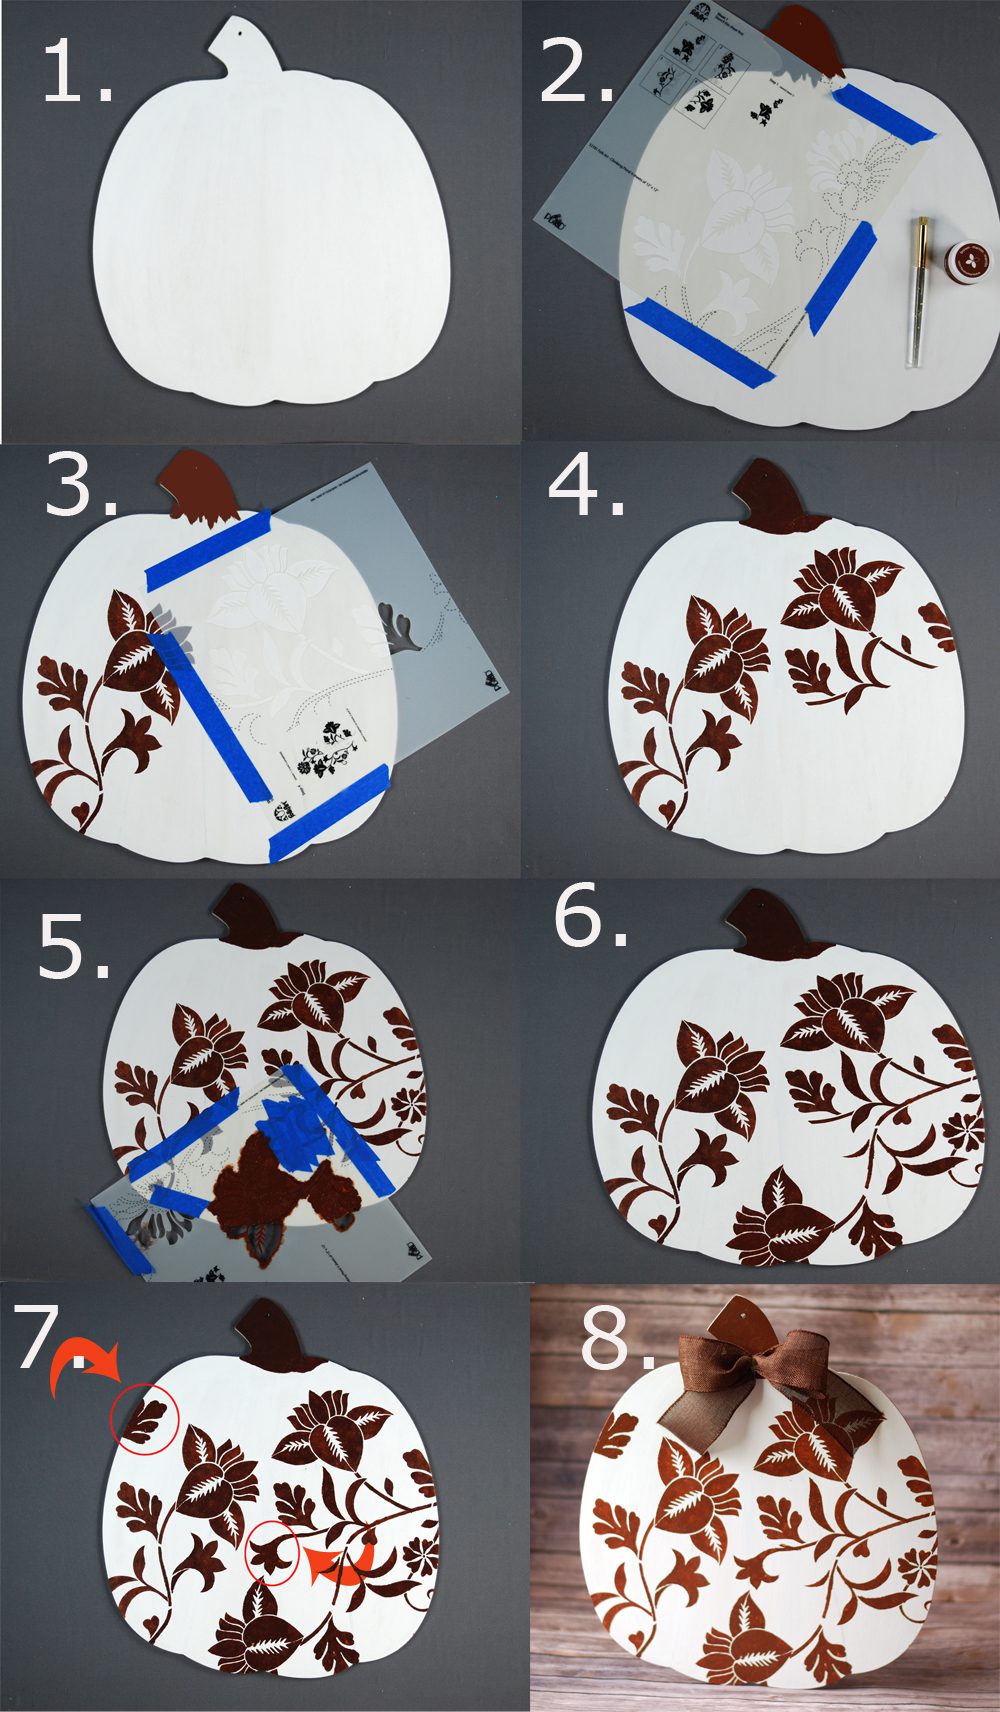
1. Paint the front of the wood pumpkin white. Allow the paint to dry thoroughly before proceeding with the next step.
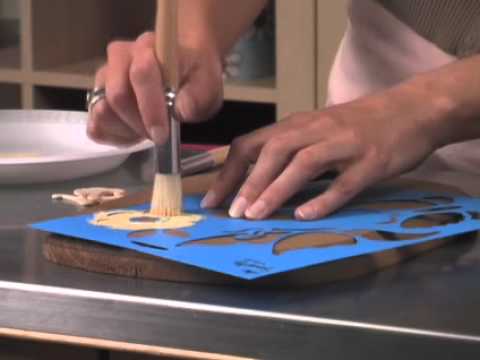
2. Paint the stem of the pumpkin brown. Attach stencil sheet number 1 onto the left side of the wooden pumpkin at a slight right angle with painters tape. Use photo number 2 as a guide for placement. Apply stencil paint with a stencil brush with an up and down motion over the open areas of the stencil. If you have never stenciled before, make sure to view the Youtube video below for a stencil technique demonstration. Let the paint dry to touch and then remove the stencil with an upward motion being careful not to smear any paint.
3. Place sheet number 4 onto the upper right side of the pumpkin at a left angle as in photo number three above. Fasten the stencil in place with painters tape.
4. Apply stencil paint to the stencil. Allow the paint to dry, then remove the stencil carefully.
5. Rotate sheet number 3 to the left and attach with painters tape. Stencil in the stem and leaf portion of the sheet. The flower on the bottom is from sheet number 1. Rotate sheet number 1 to the left and align the stencil with painted areas on the pumpkin.The stencil will be almost upside down.Cover the areas of the stencil not used in this step with painters tape; you only want the flower and bottom leaf stenciled in this step. Use photo number five as a reference.
6. Carefully remove the stencil sheet after the paint dries. Some people will consider the pumpkin finished at this point.
7. I wanted to fill in the leftover white space, so I decided to use two leafs I found in the stencils to finish the design. The left-hand leaf is from sheet 4, and the right-hand leaf is from sheet 3.
8. Tie a brown burlap ribbon in a bow around the stem of the painted wooden pumpkin. Your painted wooden pumpkin wall decor is finished and ready to hang.
If this is your first stenciling project and you are not quite sure how to stencil, then take a look at the Youtube video below. It covers proper techniques and teaches you how to be a pro in minutes.
Save
Save


