
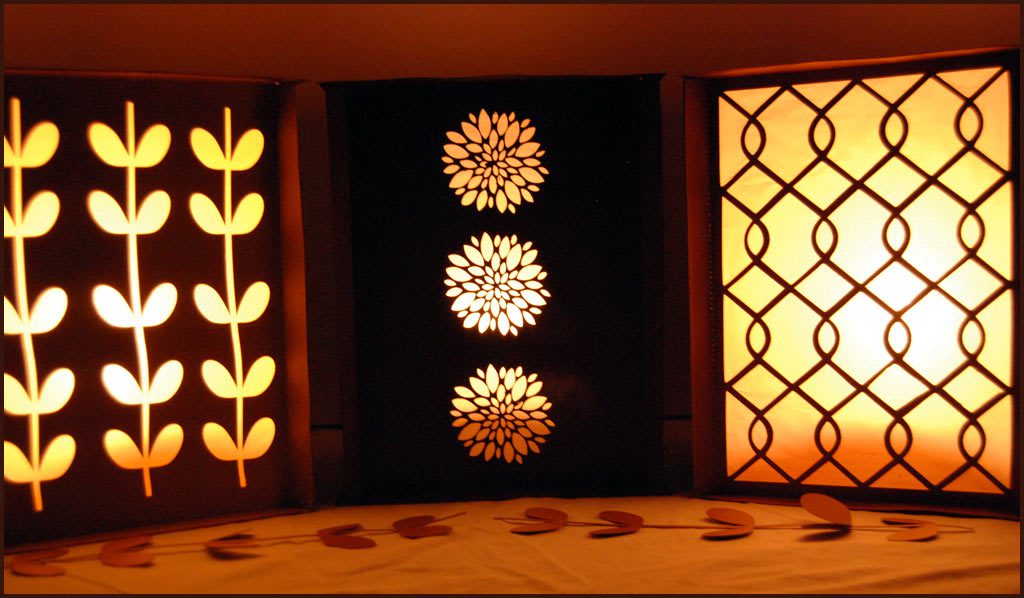
Most paper lantern projects are round in shape, and I wanted to make something a little different. These are pretty with a hint of Japanese design.
The front panels were inspired by the font peony patterns a free dingbat font. This font is beautiful and includes many more designs that I am sure you will love and be able to use in many of your other projects.


These lanterns are easy to make if you use a die cut machine ( die cut files for lantern paper craft) but still can be done by hand using a ruler and X-Acto knife. Just take your time and cut carefully and you will have stunning results.
Supplies needed:
- template files
- card stock
- poster board or cardboard (only if making a lantern that hangs)
- tissue paper
- wire or cord
- glue
Instructions:
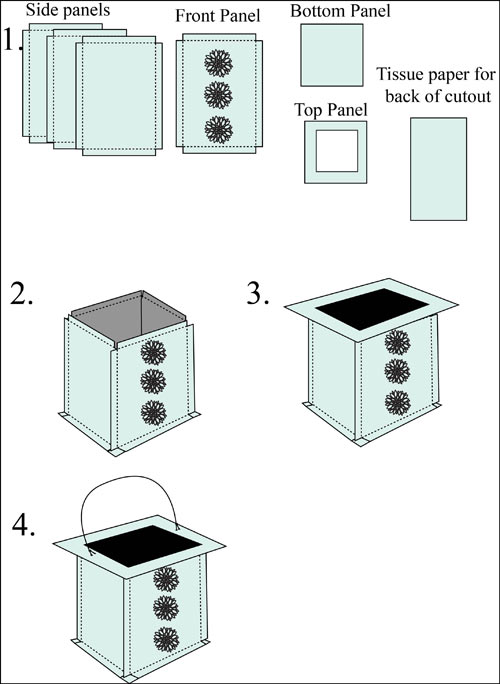
1. Cut out three side panels from cardstock of choice

2. Cut out front panel using die cut machine, or by hand using a ruler and X-Acto knife.
3. Cut a square of tissue paper and glue behind the front panel cut outs.
4. Starting with the bottom edges of panels, glue the bottom edge of the bottom piece of the lantern.I used Zig 2 way glue with good results, but you can use the adhesive of your choice. Just make sure it the bond is firm if you are planning to hang the lanterns.
5. Glue the corner sides of the lantern together.
If you want to hang the lantern, you will have to cut another bottom and top piece out of cardboard and glue to the upper and lower pieces of card stock. Spray adhesive works well for this step. It is not necessary if you plan to use the luminary on a flat surface.
6. Glue the top of the lantern to the tops of the side panels as in the instruction drawing.
7. If you want to hang the lantern, punch two holes on each side of the lantern top and run a wire or cord through.
Hang your lanterns and enjoy the compliments coming your way!
Always use common sense when burning candles, and never leave a burning candle unattended.
Save
Save
Save


